Tuesday, 29 December 2020

SharePoint Syntex - training Syntex to read your documents like a human - part 2 (entity extractors)

In the previous article we looked at how to get started with SharePoint Syntex, covering in particular the initial steps of creating a document understanding model. In this article we'll look at how Syntex can extract content from your documents - allowing you to unlock "golden" information so people don't have to open 10 documents to find what they're looking for. Before we get into things, remember that a document understanding model can have two elements:

  • A classifier - this allows Syntex to identify what type of document it is (e.g. a "C+C Statement of Work" in the example I'm using)
  • An entity extractor - unsurprisingly, this allows Syntex to extract information once trained

We'll focus on the entity extractor today, and this is the fun part. If you remember our scenario from the last article, I'm extracting the total value from each Statement of Work document I have in Office 365. Here's what that looks like - it's the 3rd highlighted rectangle here:

If you remember, creating both a classifier and an extractor uses this process:
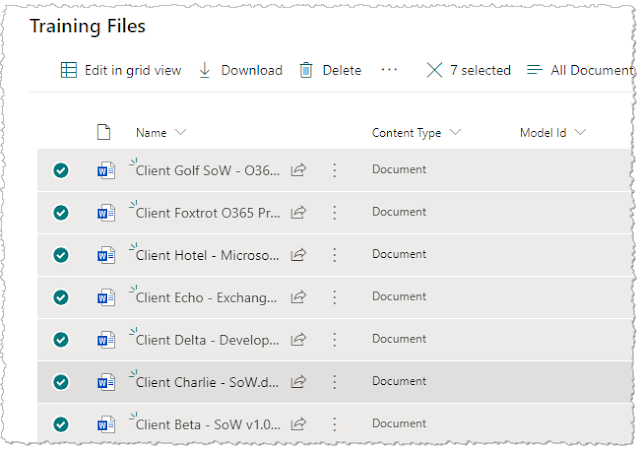
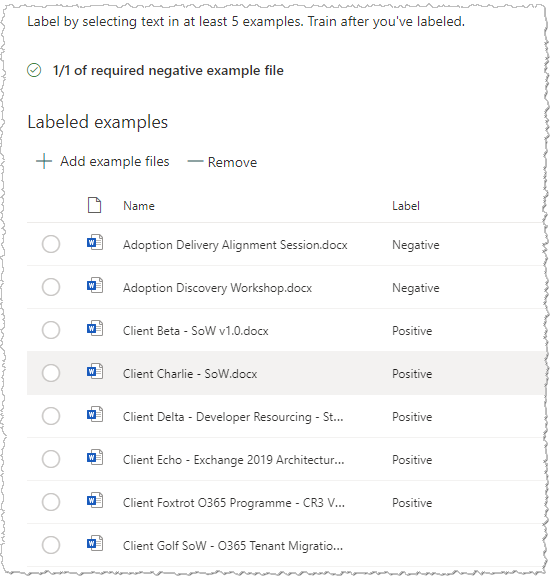
Syntex needs some training files to use as we're developing the AI model, but in my case I added these last time when I created the model initially and defined the classifier. As you might imagine, these are some test Statement of Work documents with one or two others thrown in there - the "others" are used to train Syntex about "negative" cases. These go into a special "Training Files" library within the Content Center, and I'll use those same files for the extractor.

Implementing an entity extractor in the AI model

The first step is to head back to the Content Center and find the model you're adding the extractor to:

Once in the model, choose the "Create and train extractors" action:

Next, name your extractor and specify if you want the data to be extracted to a new column on the SharePoint library (and the data type if so) - usually you do. Since I'm extracting the total value from each Statement of Work, so the name I use is "Engagement value": 

We're then taken into the "Label" tab, the first step of three when defining a classifier or extractor. 

Creating the extractor - labelling step

 
Accuracy requires labelling and "explanations"
When labelling your files for an extractor, you are teaching Syntex where the value is in your sample files. But as we'll see, simply showing Syntex where it is in a couple of files isn't enough. We need to create "explanations" too - the AI engine uses both pieces of info.

Here, we are dealing with the labelling step.

In the labelling tool (where all formatting is removed from the document), I find the costs table which is present in all of our Statements of Work and I highlight the value from the total row:

I then hit the "Next file" button and repeat for the next document in the training files library: 

Once I've labelled at least five files, I move to the "Train" tab.

Creating the extractor - explanations step

For the training part of the process, we create one or more explanations to help guide the AI further. When we created explanations for the classifier, we were providing Syntex with patterns to help identify and classify the document. For the extractor, we do something similar but here we are providing patterns to guide Syntex to the content we are trying to extract.

Explanations can be created from scratch or from a template:

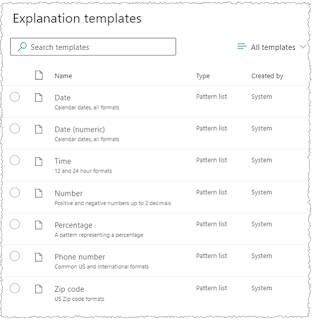
Templates already exist in the system for common pieces of info you may want to pull out of documents - for example, dates, numbers, phone numbers, addresses and so on:

For the sake of learning I'll create my explanations from scratch, even though the first one is actually a currency value and a template exists for that. I give it a name, choose the Pattern list type and provide the variants to account for how the engagement value may be written in my documents (different number formats):

I then save this explanation and create another one. This time I'm helping the AI find the overall section within our SOW documents which the costs table can be found in - I'm simply looking for the title of that section, "Fees and Payment":


I create one more to find the phrase "Total".

Now that I have all of those, I combine them so that I can essentially say "first, please find the phrase 'Fees and Payment', then 'Total', THEN the thing that looks like a GBP currency value. I do this by creating a new explanation of type "Proximity" - and specifying how far apart each element is. Syntex uses the concept of tokens to specify proximity, and my resulting explanation looks like this:   

More accurately, I'm saying "first find the 'Fees and Payment' phrase, then find 'Total' which is more than 20 tokens away but less than 100. Once there, find the thing that looks like a GBP currency value which is VERY close, in fact less than 10 tokens away.

As you can imagine, tuning the tokens in a proximity explanation helps the accuracy of the AI and reduces the chances of Syntex being unable to find your content. My final set of explanations looks like this - it's the 3 phrase or pattern explanations AND the proximity explanation which combines the others:

Creating the extractor - training/testing step

I'm now ready to train and test. Similar to when I did this for the classifier, I select some training files which haven't been used in labelling (including one document that isn't a Statement of Work):


The "Prediction" column then tells me what Syntex predicts would be the extracted text for each document. Success! This looks good:


That's almost a 100% success rate - but you might notice that the model failed to extract content from one SOW document, and indeed Syntex tells me this:


Upon further inspection, this particular document seems to have a structure different to what I'm expecting - specifically, I find that the author has used a different heading for this section of the document!


So at least I understand why this is happening - I can now tweak my explanations if this is an expected case, or politely remind the project manager that they should be following our standard structure! Either way, there's a path to resolving this. 

I now finish the process by clicking on the "Exit training" button:


Seeing results - applying the model to document libraries

Our work is now done! We have a completed AI model and we can apply it to document libraries around the Microsoft 365 tenant:

A Syntex AI model does need to be applied to libraries individually, but in most cases your documents of a certain type may not be distributed that widely anyway. In the future, we can expect APIs and provisioning mechanisms to manage this at scale.

Once the model has been applied, Syntex extracts the content I trained it to - meaning I don't need to open each individual document:

Summary

We've now seen the process of creating a document understanding model in SharePoint Syntex - something that will allow us to recognise the document AND extract content from it. We can take this further too. Instead of just extracting a single piece of information (e.g. the value from a Statement of Work) we can, of course, extract multiple pieces in the same extractor.

Overall, these capabilities of Syntex provide a great leap forward in terms of how information can be found. High value information no longer needs to be buried inside documents, meaning that employees either do not see it or are forced to open many individual documents to find it. We can create mini-databases and tools from content that was previously locked away - including capabilities which provide sorting, filtering and powerful search experiences. To the future!

Sunday, 13 December 2020

SharePoint Syntex - training Syntex to read your documents like a human

A long time ago, when the human race started to use ink to inscribe information on parchment or papyrus, this was a great leap forward from carving into stone or clay. Information became easier to create and transport, and knowledge instantly started flowing in ways it had not done before. Today, *all* of us are closely tied with the process of creating, sharing and consuming documents - the world literally revolves around them.

But documents have their constraints of course. Critical data and knowledge gets buried within them, leading to a series of challenges that mean very few organizations truly get value from the content they create. You might be familiar with the statistic from McKinsey research that the average knowledge worker spends 20% of their time (a day per week!) just searching for information or expertise within their company. That could be conservative though - IDC's Knowledge Worker survey (behind paywall) suggests the figure could be closer to 30%.

One of the reasons for this is that documents generally need to be opened to access their information - and it's inherently time-consuming to open 20 documents to establish which one has the information you're looking for. As you might know, Viva Topics and SharePoint Syntex introduce AI-powered capabilities into Microsoft 365 to solve several aspects of the knowledge challenge. In this post, we'll look at SharePoint Syntex, and how to teach it to:

  • Automatically recognize different types of documents - usually from some consistent content within the document (e.g. the phrase "Statement of Work") 
    • This means the document can automatically inherit a retention policy or appear in search results in a certain way (for example), all without a human tagging each document. In Syntex, this is a Classifier
  • Pull specific information out of documents - meaning that high-value data is no longer locked inside documents, whether you have 100 or 100 million.
    • With this capability, the specific information is pulled out of each document and stored as metadata in SharePoint columns. In Syntex, this is an Extractor

An example in my company

At Content+Cloud, two of our most common document types are Proposals and Statement Of Work documents - no surprise given that we deliver projects and services. I've redacted the numbers, but here's what the costs/investment table looks like in one of our real SOWs:

I've highlighted a couple of things in the image above. When I'm opening the document to find the total value of the project, as a human my brain is instinctively following this process:

  1. Find the "Fees and Payment" section
  2. Look for the "Total" row
  3. Find the £ value that is in that row

In this article, we'll teach SharePoint Syntex to do the same thing (in addition to recognizing Statement of Work documents in the first place). Syntex can then pull out the project value from 100s or 1000s of our SOWs much faster than any human ever could. Given that we create many SOWs each week, knowing that the technology can stay on top of this unlocks further benefits. 

Creating a document understanding model in Syntex

I'm going to skip over the initial pre-requisite step of creating a Content Center in your Microsoft 365 tenant - quite simply, this is done in the SharePoint admin center for your tenant, and "Content Center" appears as a new site type. Once you have that, you can begin creating models. We're going to do two things here:

  • Create a Classifier so that SOWs can be identified
  • Create an Extractor so that the value can be extracted
In both cases, we follow this process:

To start, navigate to your Content Center and click the "Create a model" button:

Give it a name (in my case it's a Content+Cloud Statement of Work) and choose whether you want to create a new content type or use an existing one:

Notice that you can also specify a retention label for this model. This is huge step forward in helping organizations meet their compliance needs! Once trained, not only can SharePoint Syntex automatically recognize a Statement of Work within my tenant (regardless of which site or Team is it stored in), it can ensure these documents have appropriate information governance applied. For our company, a Statement of Work is a contractual client document - and as such we should retain it for a number of years by default. Syntex makes this possible without a human needing to label each SoW - and the pattern recognition we'll see provides the power and flexibility to recognise reliably.

In this step I see all of the published retention labels in my tenant: 

Now that we've created our model, the first major configuration step is to add some files for training - we can use these to train both the Classifier and the Extractor. The training files should be a set of test files which are Statements of Work, but also at least one which isn't. I supply some files as shown:

The "Training Files" library is a special document library within the Content Center where these files go. It's common to stack up files from different models you build here (as shown below), but essentially you're adding a set of files you're previously gathered up each time you build a model:

How many training files do I need?

Syntex requires you to add at least 5 files which match the document type you're working with, and at least 1 which isn't. However, the best idea is to gather up and add more than 6 files because you'll use them in two steps:
  • Labelling at least 6 files during initial training
  • Using the remaining unlabelled files to test your model

Creating the Classifier


Now we have some training files, click the "Train classifier" button:

Creating the Classifier - labelling step


In this step we're on the first tab ("Label") and we're essentially telling Syntex which of those training files are the ones which match the content type (in my case, a C+C Statement of Work) and which are not. Within the labelling tool, the interface provides a toolbar with "Yes" and "No" buttons to do this (highlighted below):

I step through each of my training files and click the "Yes" and "No" buttons appropriately - this is how labelling is done for a Classifier. Once done, the model trains itself automatically and the "Label" column confirms the status:

Creating the Classifier - explanations step

Now move to the "Train" tab. We now need to add one of more "Explanations" - these help the model further, since just having some labelled sample documents isn't enough. Think of this as the system needing to understand more about the patterns that identify this document type.

To start, click the "New" button within the Explanations area - notice that you can start from a blank example or from a template:

Templates, in case you're wondering, are for common snippets of content which may help classify (or you may want to extract from) a document - dates, phone numbers, zip codes, currency amounts, e-mail addresses and so on):


In this case, we can create from blank. What I'm going to do is create a phrase list explanation, using a phrase which is only found in a Statement of Work - when doing this, one thing to look out for is that often you can't use the simple case alone. For example, the phrase "Statement of Work" appears in many of our other documents which aren't actually Statements of Work! So instead, I'm using something from the small print that will only be in a SOW - in the image below, you can see it used as my phrase and also on the right in the simplified document view:


Click "Save" to finish creating the explanation.
 

Creating the Classifier - training/testing step

Now it's time to test the Classifier. To do this, move to the "Test" tab and click the button to add example files:


I can now select some previously added example files - these need to be files I haven't already used in the labelling process. To test properly, I select some documents which are SOWs and some which aren't:


Click the "Add" button and the files will be used for the testing. What you should see is that the model has correctly identified the documents which are a positive match, and others show as negative:


Excellent!

At this point, the "Classifier" part of our AI model is complete - Syntex will now be able to recognize this type of document anywhere in the Microsoft 365 tenant. The model can now be applied to document libraries and the content type we created or used will be applied:


As any experienced SharePoint or Microsoft 365 practitioner knows, there are SO many possibilities now that the content type is known. From automated workflows, information protection policies, filtering and special appearance in search results through to document lifecycle aspects such as retention and disposition - the list goes on. 

But let's not stop there - before we complete the final steps of making this happen, we'll do more than just identify the document type. In the next post, we'll go back to where we started by implementing an "Extractor" in SharePoint Syntex to pull out the Statement of Work value - thus ensuring it's not buried in each document.

Monday, 16 November 2020

Automating location check-ins with Power Automate

Geofencing is the idea of a location service triggering an action whenever a device (i.e. a user's mobile device) moves in or out of an area, and there are lots of great use cases. On the personal/home automation side, you might want to automatically switch the house lights off and activate the alarm when you leave home (think IFTTT or Zapier if you're familiar with those), and on the work side your employer might provide an app which automatically checks you in (or out) of an office location dependent on your location - as just two examples. I was looking at the latter scenario for our internal desk booking app as part of our "controlled use of offices during Covid" plan. 

You can imagine lots of cases where knowing the user's location and whether it has changed can be powerful.

The Power Platform has a couple of ways to tap into this. I'd been researching the Location trigger in Power Automate, and this provides a Flow action named "When I enter or exit an area":

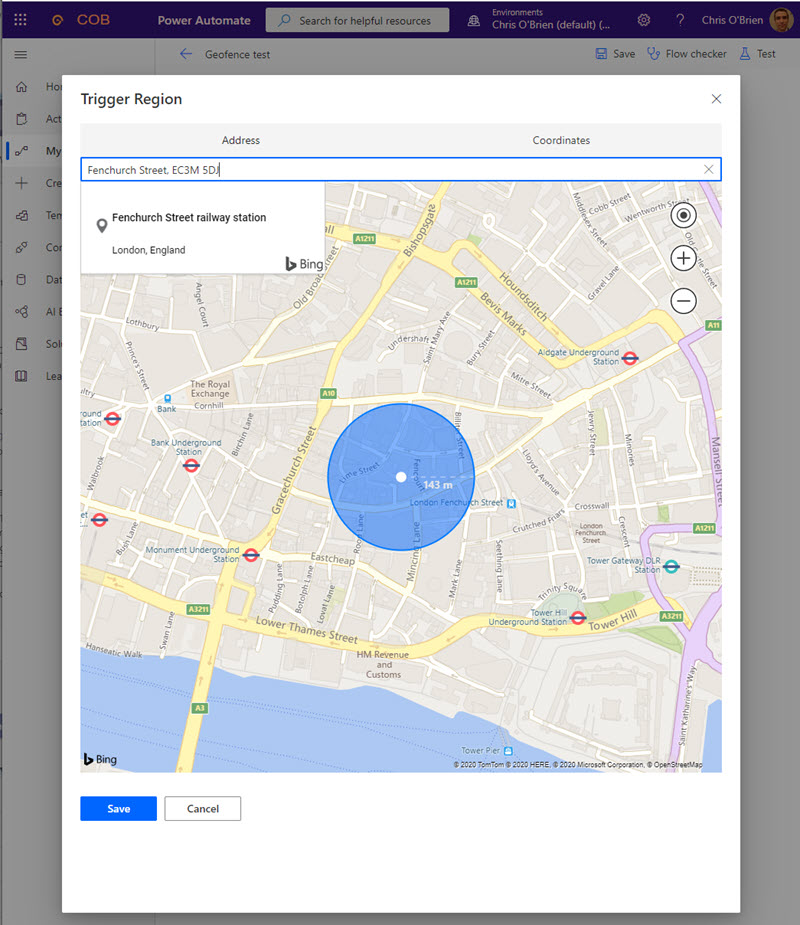
As is normal with geofencing, you specify a location anywhere in the world and create a radius around it. The location is approximate since GPS on the user's mobile device is used, but it works great for most purposes: 


Things were working great for a while, but then I ran into this:

The Location trigger has been removed from Power Automate!

The trigger was only ever in preview, and sadly in the few weeks since I had this article in draft (and had taken the above screenshots) it was removed. At this stage it's unclear whether it will return, and whilst there are traces of it on the internet there are no mentions of it within Microsoft documentation.

So that's a shame! To be quite honest, there was a challenge with the trigger anyway in the Power Platform - it could only ever be used for personal Flows, meaning each user who should use the capability would need to create their own Flow. Clearly this doesn't work for any kind of business solution provided by an organization, but could still be useful for personal automation.

How else can we automate based on user location?

The good news is that Power Automate is still able to understand the user's device location. A fully automated solution which is triggered simply by moving in or out of a defined region is no longer possible, but if you're happy to have users manually click a button on their device, similar automations are still possible. Indeed, in some scenarios this approach may be preferred so that there's a level of human control and opt-in - allowing the user to avoid triggering a process if the circumstances don't warrant it (e.g. leaving the area radius briefly to pick up lunch). 

So, let's take a look at how we can build Power Platform apps which account for the user's location.

Using Flow buttons to log a location visit

Flow buttons provide a great way to build a mobile app with a super-simple user interface - without having to delve into any kind of coding or the world of native iOS or Android development. In my example below, I'm using a simple button and a very simple form. But first, the prerequisites.

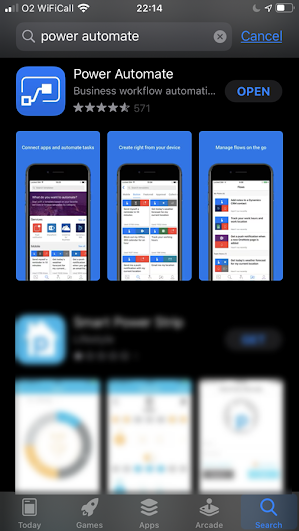
The first requirement for a solution like this is for users to have the Power Automate app installed on their mobile device. Your organization could push it out using a MDM or MAM solution, or it's available in both the Apple and Google app stores:

The user will need to sign-in to the app with her Microsoft 365 identity. The other important thing is that location services are enabled on the device for the Power Automate app - an obvious necessity if we are collecting and logging the location. 

Once in the app, the user would go to the "Buttons" area in app using he navigation bar along the bottom.

Any Flows which have been created using the "Manually trigger a Flow" trigger will appear in here: 


In my solution, I have a Flow to log details of a location visit - this is named "Report location status" in the image above, and you can also see some other Flows which also use the the button trigger. As you've probably gathered, these are known as "Flow buttons" and provide a really quick and easy way of manually triggering a process. No need to create and deploy a custom app - instead we can piggy back on what the Power Platform provides. 

When the button is clicked, some information can be selected to feed into the process. In my example of logging a location visit, the Flow asks for a "status" to be collected:


In the case of my solution, when the user submits this "location report" I store the details in a SharePoint list. Power Automate has done the hard work of automatically deriving the user's location at the time of pressing the button, and with a little column formatting magic I can display a small map for the location instead of just the address text:


So that's it! With fairly minimal effort in the Power Platform we have a mobile app which can collect the user's location, collect additional information and log it into a central store such as a SharePoint list in Microsoft 365.
 

How do we build that?

We've covered what the user would see, but what is needed in Power Automate to create this? We start by creating a Flow with the "Manually trigger a flow" trigger. Notice in my case I've added a single input named "Status", and supplied some help text:


You could actually stack several of these inputs and essentially create a mini-form which is presented to the user when they hit the button - which becomes quite powerful when you consider that no coding is required and we don't even need a Power App. 

The next step in the Flow is simply to log the item to SharePoint. I have a list ready to go with appropriate columns, and I just need to configure the Flow action to store the data in each:

 
The important thing is that several tokens are available from the trigger, including:
  • User name
  • User email
  • Timestamp
  • Date
  • fullAddress - this is the full address of the auto-derived location of your user
  • Many address sub-components:
    • Street
    • City
    • State
    • Postal code
    • Country
    • Latitude
    • Longitude
  • Any inputs you have added (e.g. "Status") in my case 
The final step in my Flow is to send a confirmation to the user that the report was logged successfully:


Which results in this appearing on the device:


So we've managed to capture the user's location and status report of the location, and confirmed back to them that the data was saved. 

Summary


The Power Platform has many amazing facilities for building applications, and that's especially the case for simple mobile applications. The ability to tap into device features such as location and the camera mean that you can build very capable apps quickly, without code - and certainly without all the hassles of native app development and distribution. In this post we looked at how Flow buttons can be used to quickly trigger a process from the mobile app, and how to capture the user's location at the time. 

Unfortunately the "When I enter or exit an area" Power Automate trigger that was in preview hasn't made it to release - but we hope it comes back because that would unlock some great scenarios around automation and the user's location. Come on Microsoft!

Monday, 21 September 2020

5 ways to use AI to supercharge your content in Microsoft 365

We’re all familiar with increasing rates of data growth, and practically every organization using Microsoft 365 has an ever-growing tenant which is accumulating Teams, sites, documents and other files by the day. The majority of organizations aren’t making the most of this data though – in the worst cases it could just be another digital landfill, but even in the best case the content grows but doesn’t have much around it in terms of intelligent processing or content services. As a result, huge swathes of content go unnoticed, search gives a poor experience and employees struggle to find what they’re looking for. This is significant given that McKinsey believe the average knowledge worker spends nearly 20% of their time looking for internal information or tracking down colleagues who can help with specific tasks. At the macro level, this can accumulate to a big drag on organizational productivity – valuable insights are missed, time is lost to searching, and opportunities pass by untapped.

In this post, I propose five ways AI can help you get more value from your data.

1. Use AI to add tags and descriptions to your images so they can be searched

Most organizations have a lot of images - perhaps related to products, events, marketing assets, content for intranet news articles, or perhaps captured by a mobile app or Power Apps solution. The problem with images, of course, is that they cannot be searched easily - if you go looking for a particular image within your intranet or digital workplace, chances are you'll be opening a lot of them to see if it's what you want. Images are rarely tagged, and most often are stored in standard document libraries in Microsoft 365 which don't provide a gallery view.

A significant step forward is to use image recognition to automatically add tags and descriptions to your pictures in Microsoft 365. Now, the search engine can do a far better job of returning images - users can enter search terms and perform textual searches rather than relying on your eyeballs and lots of clicks. Certainly, the AI may not autotag your images perfectly - but the chances are that some tagging is better than none. Here are some examples I've used in previous articles to illustrate what you can expect from the Vision API in Azure Cognitive Services:


Image

Result

Image

Result


Image

Result


2. Use AI to extract entities, key phrases and sentiment from your documents

We live in a world of documents, and in the Microsoft 365 world this generally means many Teams and SharePoint sites full of documents, usually with minimal tagging or metadata. Nobody wants the friction of manually tagging every document they save, and even a well-managed DMS may only provide this in targeted areas. Auto-tagging products have existed for a while but have historically provided poor ROI due to expensive price tags and ineffective algorithms. As a result, the act of searching for information typically involves opening several documents and skimming before finding the details you're looking for.

What if we could extract key phrases from documents and known entities (organizations, products, people, concepts etc.) and highlight them next to the title so that the contents are clearer before opening? Technology has moved on, and Azure's Text Analytics API is far superior to the products of the past. In my simple implementation below I'm simply sending each document in a SharePoint library to the API and then storing the resulting key phrases and entities as metadata. I also grab the sentiment score of the document as a bonus:  

A more advanced implementation might provide links to more information on entities that have been recognized in the document. The Text Analytics API has a very nice capability here - if an entity is recognized that has a page on Wikipedia (e.g. an organization, location, concept, well-known person etc.), the service will detect this and the response data for the item will include a link to the Wikipedia page:

There are lots of possibilities there of course!


3. Create searchable transcripts for old calls, meetings and webinars with speech-to-text AI

If your company uses Microsoft 365, then Stream is already capable of advanced speech-to-text processing - specifically, the capability which automatically generates a transcript of the spoken audio within a video. This is extremely powerful for recording that important demo or Teams call for others to view later of course. However, not every organization is using Stream - or perhaps there are other reasons why some existing audio or video files shouldn't be published there. 

In any case, many organizations do have lots of this type of content lying around, perhaps from webinars, meetings or old Skype calls. Needless to say, all this voice content is not searchable in any way - so any valuable discussion won't be surfaced when others look for answers with the search engine. That's a huge shame because the spoken insights might be every bit as valuable as those recorded in documents. 

A note on Microsoft Stream transcripts

Whilst Stream is bringing incredible capabilities around organizational video, it's worth noting that transcripts are not searched by Microsoft 365 search - only by 'Deep Search' in Stream. So if you've honed in on a particular video and want to search within it, Deep Search is effective - but if you're at step one of trying to find content on a particular topic, videos are not currently searched at the global level in this way.

Speech-only content comes with other baggage too. As just one example, it may be difficult to consume and understand for anyone whose first language is different from the speaker(s). 

The Azure Speech Service allows us to perform many operations such as:

  • Speech-to-text
  • Text-to-speech
  • Speech translation
  • Intent recognition

More advanced scenarios also include call recording, full conversation transcription, real-time translation and more. In the call center world, products such as Audiocodes and Genesys have been popular and are increasingly integrated with Azure's advanced speech capabilities - indeed, Azure has dedicated real-time call center capabilities these days

At the simpler end though, if your company does have lots of spoken content which would benefit from transcription you can do this without too much effort. I wrote some sample code against the API and tested a short recording I made with the PC microphone - I don't need to tell you what I said because the API picked it up almost verbatim: 

If we're splitting hairs, really I said this as one sentence so the first full stop (period) should arguably be a comma. Certainly this was a short and simple recording, but as you can see the recognition level is extremely high - and astonishingly, the API even managed to spell O'Brien correctly! 

Here's the code required to call the API, largely as described in the docs:


Enabling technology - Azure Cognitive Services - Speech API  (speech-to-text in this case) 

4. Use AI to translate documents 

The case for this one is simple to understand - an organization can have a variety of reasons for translating documents, and AI-based machine translation has advanced sufficiently that it's precise enough for many use cases. Working with international suppliers or clients could be one example, or perhaps it's because search isn't effective enough in a global organization - users are searching in their language, but key content is only available in another language. 

Azure allows you to translate documents individually or at scale through APIs or scripting, all in a very cost-effective way. I didn't need to build anything to tap into it, since a ready-made front-end exists in the form of the Document Translator app in Github - once hooked up to my Azure subscription, I'm ready to go. In this tool, if you supply a document you get a completed document back - in other words, pass in a PowerPoint deck and get a file with each slide translated in return - no need to paste anything back together. The Translator capability in Azure Cognitive Services allows you to tap into same translation engine behind Teams, Word, PowerPoint, Bing and many other Microsoft products, but also to build your own custom models to understand language and terminology specific to your case. 

My French is a bit rusty, but these look fairly good to me: 


Translation of documents you already have offers lots of possibilities, with improved search being just one example. But there are many other high-value translation scenarios too, such as real-time speech translation - something that's now possible in Teams Live Events. With Azure Cognitive Services, it's also possible to build the capability into your own apps without needing to use Teams, and you're tapping into the same back-end underneath.


5. Extract information from documents such as invoices, contracts and more

In one of the earlier examples we talked about extracting key phrases, entities and sentiment. In some cases though, the valuable content within a document is found within a certain section of the document - perhaps a table, a set of line items or grand total. Every organization in the world has loosely-structured documents such as invoices, contracts, expense receipts and order forms - but often the valuable content is deeply embedded and each document needs to be opened to get to it. With the Forms Recogniser capability in Azure, you can use either pre-built models for common scenarios or train a custom model yourself, allowing the AI to learn your very specific document structure. This is the kind of capability that is coming in Project Cortex (essentially a version of this tightly-integrated with SharePoint document libraries), but it may be more cost-effective to plug into the Azure service yourself. 

Some examples are:
  • Forms - extract table data or key/value pairs by training with your forms
  • Receipts and business cards - use pre-built models from Microsoft for these
  • Extract known locations from a document layout - extract text or tables from specific locations in a document (including handwriting), achieved by highlighting the target areas when training the model 
So if you have documents like this:


..you could extract the key data and make better use of it (e.g. store as searchable SharePoint metadata or extract into a database to move from unstructured to structured data).  

Enabling technology - Azure Cognitive Services - Vision API (Form Recognizer in this case) 

Conclusion

AI is within reach now, and many of the above scenarios can be achieved without coding or complex implementation work. There needs to be a person or team somewhere who knows how to stitch together Azure AI building blocks and Microsoft 365 of course, but the complexity and cost barriers are melting away. 

Beyond the scenarios I present here, lots of value can be found in use cases which combine some of the above capabilities with other actions. Some examples where you could potentially roll your own solution rather than invest in an expensive platform could be:
  • Analyze call transcripts for sentiment (run a speech-to-text translation and then derive sentiment) and provide a Power BI report
  • Perform image recognition from security cameras and send a push notification or post to a Microsoft Team if something specific is detected
  • Auto-translate the transcript of a CEO speech or townhall event and publish on a regional intranet
The AI element of all of these scenarios and more is now easily achieved with Azure. What a time to be in technology!